
|
Who doesn't love glitter. I think there is always an excuse to bling up a project with a bit glitter. I've been stewing over this idea for a while now, and a bit of yuck weather is the perfect opportunity to give it a go. I don't know about you but I need glitter felt balls in my life and wasn't quite sure where to start, so an experiment was in order! 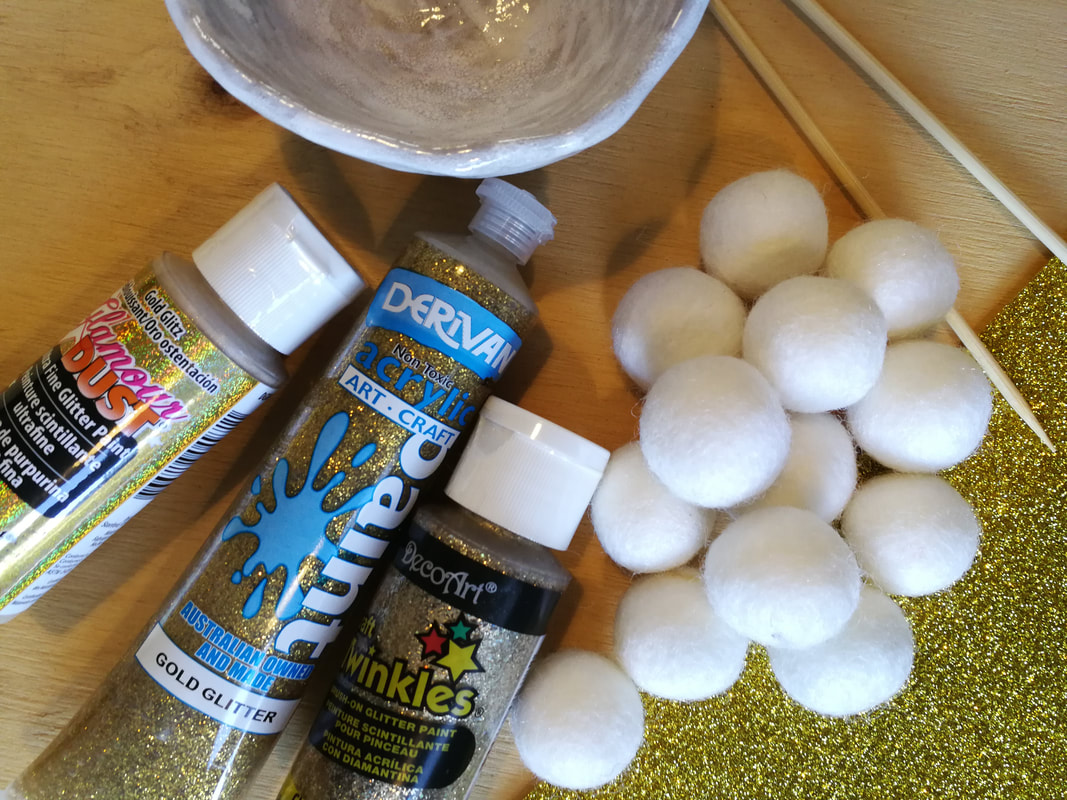 I popped down to my local craft shop and bought every glitter fabric or standard glitter paint I could get my hands on. Those turned out to be: Derivan Acrylic Gold Glitter $5.99 DecoArt Glamour Dust- Gold Glitz $7.99 DecoArt Craft Twinkles- Champagne $7.99 Other bits I used were Wooden skewers Paint Brush White Felt Balls With supplies at the ready, off I went. 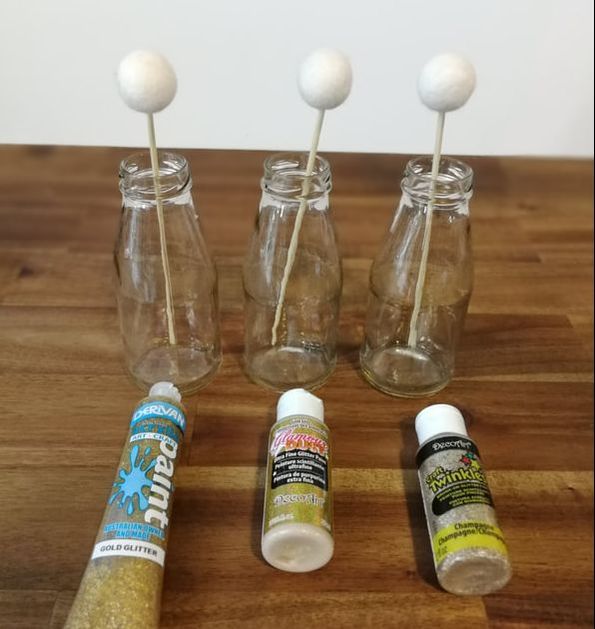 To get started I pushed the felt balls onto the skewers, then with each paint, painted each of my three felt balls. The Derivan had quite chunky glitter and I needed to put quite a lot on for a good coating of glitter. The Glamour Dust has a yellow tint to the paint, I hoped it would dry clear but it didn't. It was quite difficult to see where the glitter was. The Craft Twinkles was very promising, fine glitter with good coverage.  Once dry, they all have quite different looks, and I can see more application of paint would change them all again, depending what you want to do with them. I was pleased to find the glitter is firmly fixed to each, with only a slight bit of shedding. 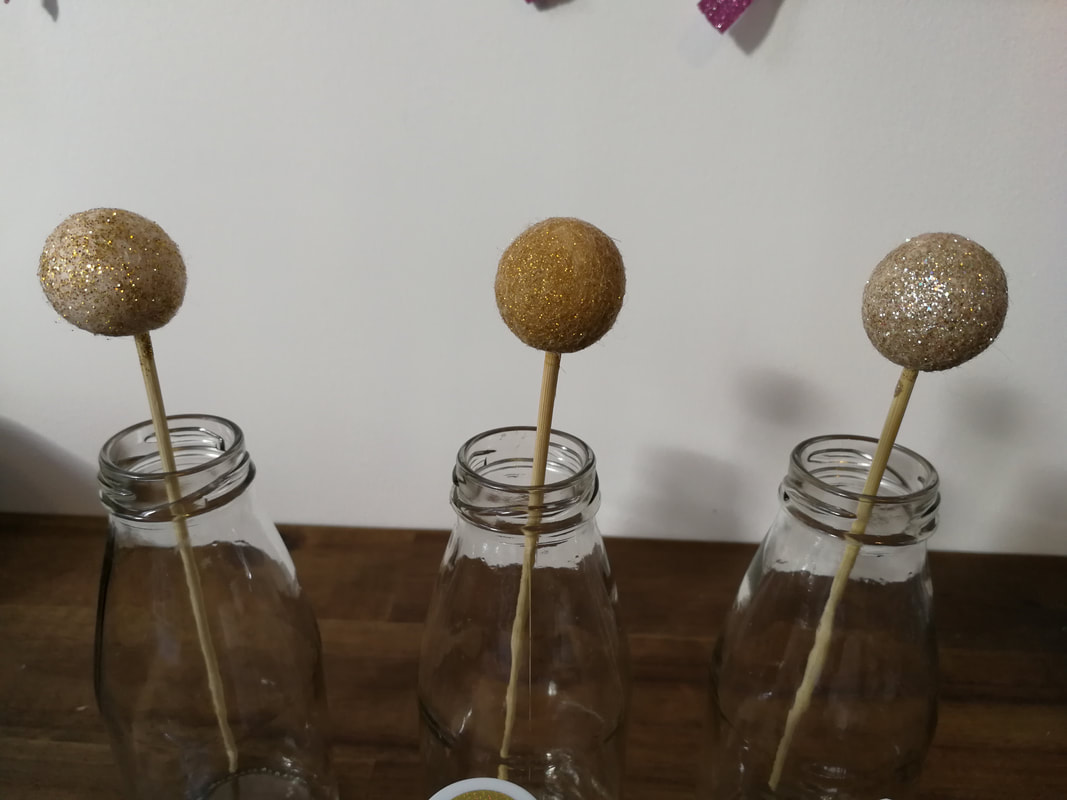 As you can see, the Derivan was quite patchy, it the glitter was a great bright gold colour. The Glamour Dust did have a background colour and the glitter was fine and sparkly. The Craft Twinkles was my pick, a great colour and coverage and a plus it comes in a 11 different glitter colours. I hope you have fun with this, I'll really did. Next up, using these for a few cute projects. Happy crafting, Bex. Xx
0 Comments
I LOVE felt flowers! Big or small they are so fun are gorgeous for all sorts of projects. I've had a ton of fun trying out a couple of different methods and styles, I tell you, there are so many beautiful projects. Paper templates make beautiful hand cut flowers, there are also some great dies to use with a cutting machine. Of course, in the name of craft I had to try both. Paper Patterns The paper version was super simple, check out my Pintrest board for some great templates. I found the best way to attach the tricky little pattern to my felt was by taping it down, then cutting around the pattern. Start from one end and roll the felt up using a glue gun to secure it all together. 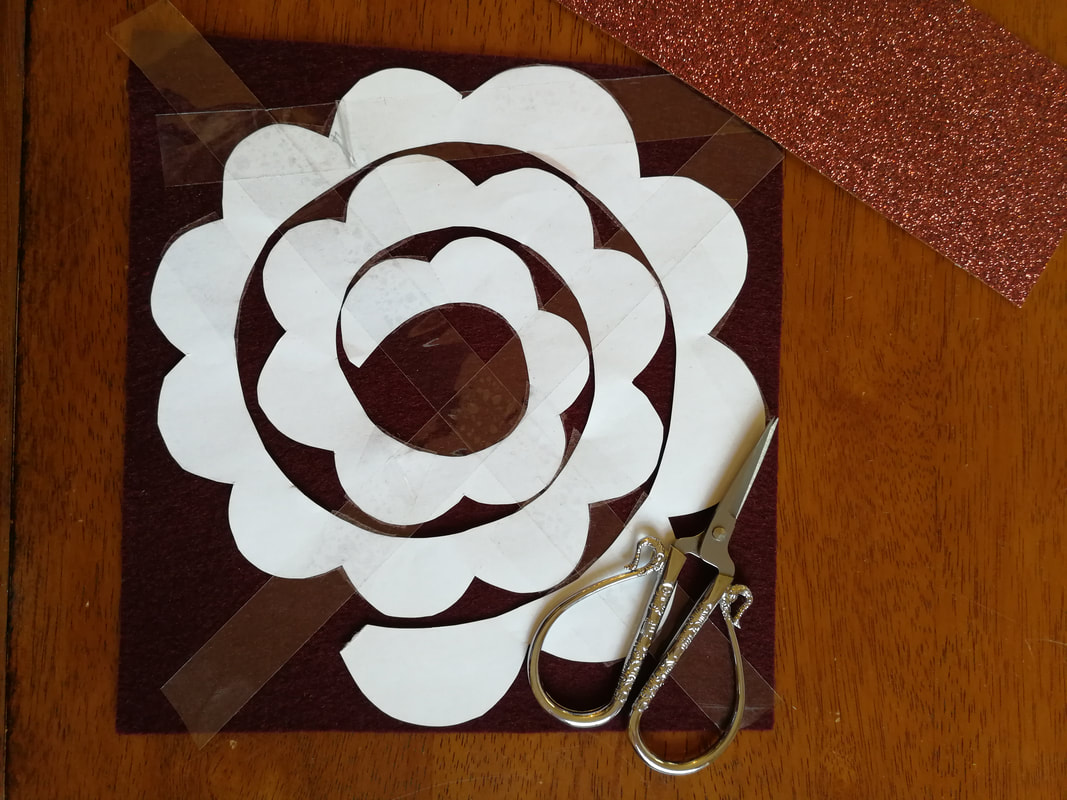 Die Cut The die I used was the Spiral Flower from Sizzix, super easy to use. These dies are made for a Big Shot machine but will work through a Cuttlebug too. As with the handcut flower, start rolling and glue as you go. Easy peasy! The great thing about this type of spiral pattern is the versatility of it. I made a couple of variations using contrasting felt balls and a sparkly strip of glitter felt. Gorgeous!  So, what to do with your felt flowers? You're only limited by your imagination! Put them on florist wire and in a vase, use them as flourishes on a quilt or wall hanging, hair accessories or something like this >> 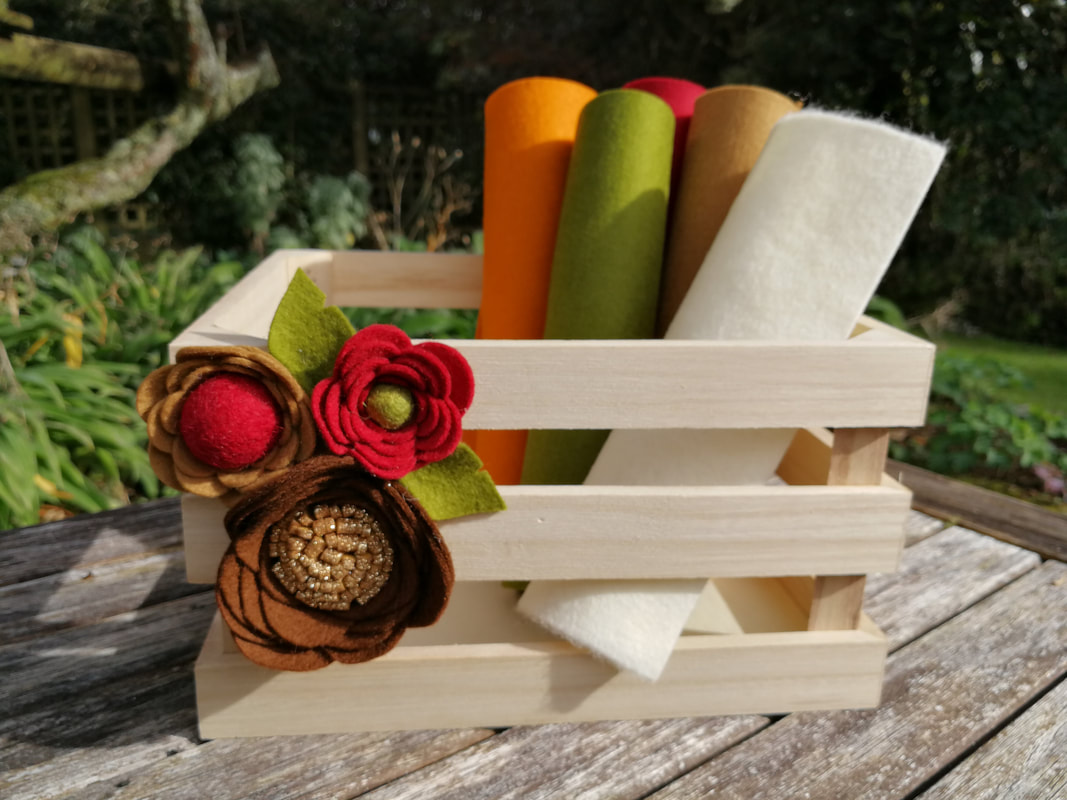 If you loved this project and want more inspiration, one of my favourite felt florists Flohra Design has a wonderful blog and YouTube channel with heaps of tutorials you'll just love! Happy Making! Bex xx |
AuthorHi! I'm Rebecca. Archives
March 2023
Categories
All
|
 RSS Feed