|
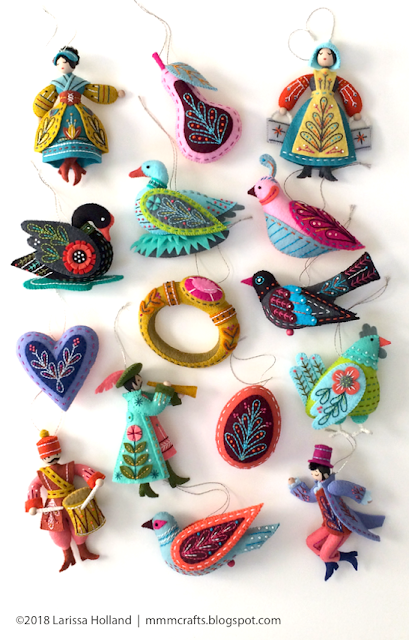
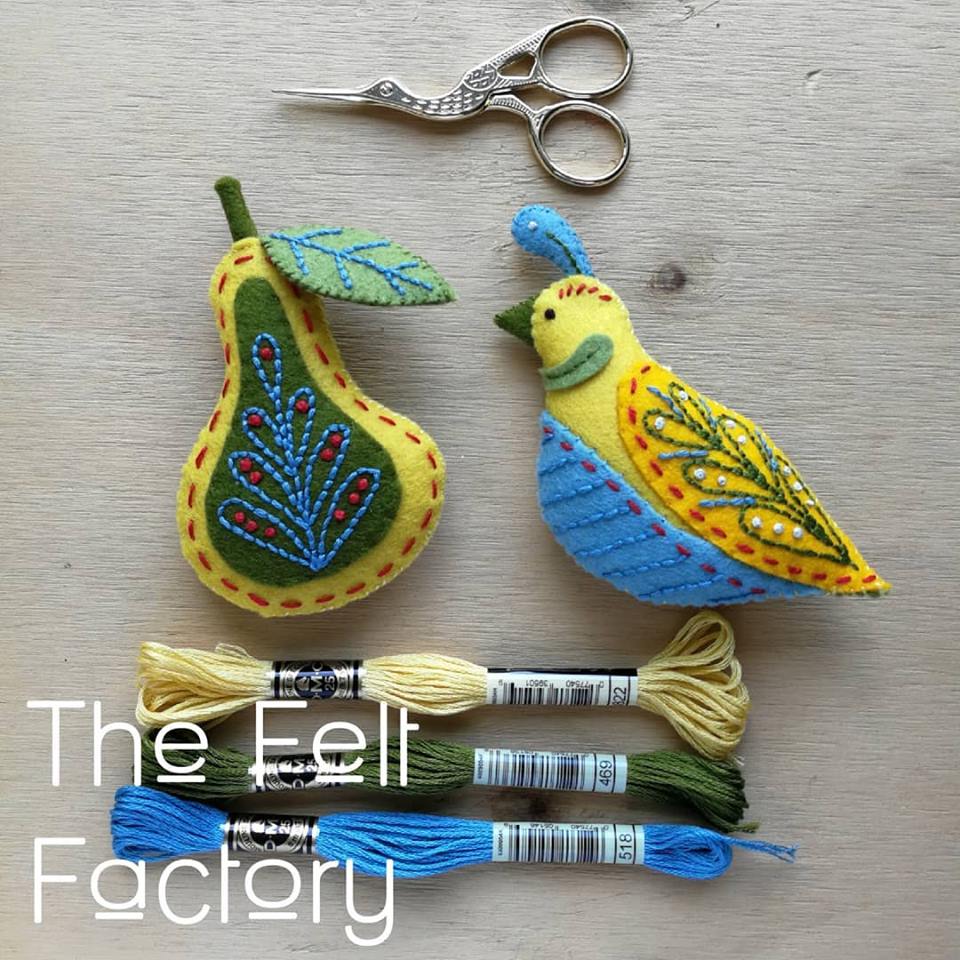
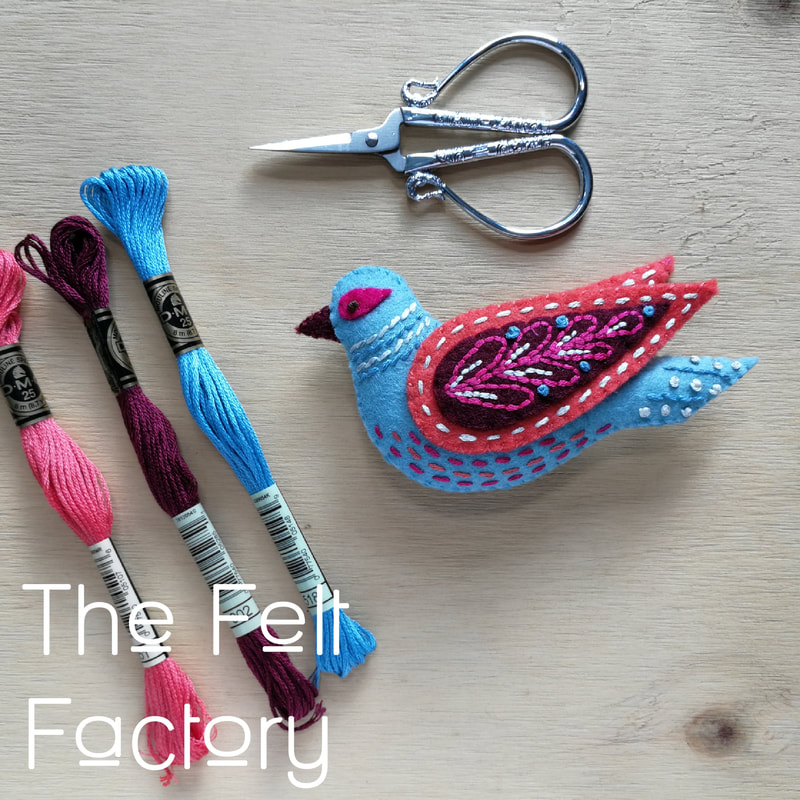
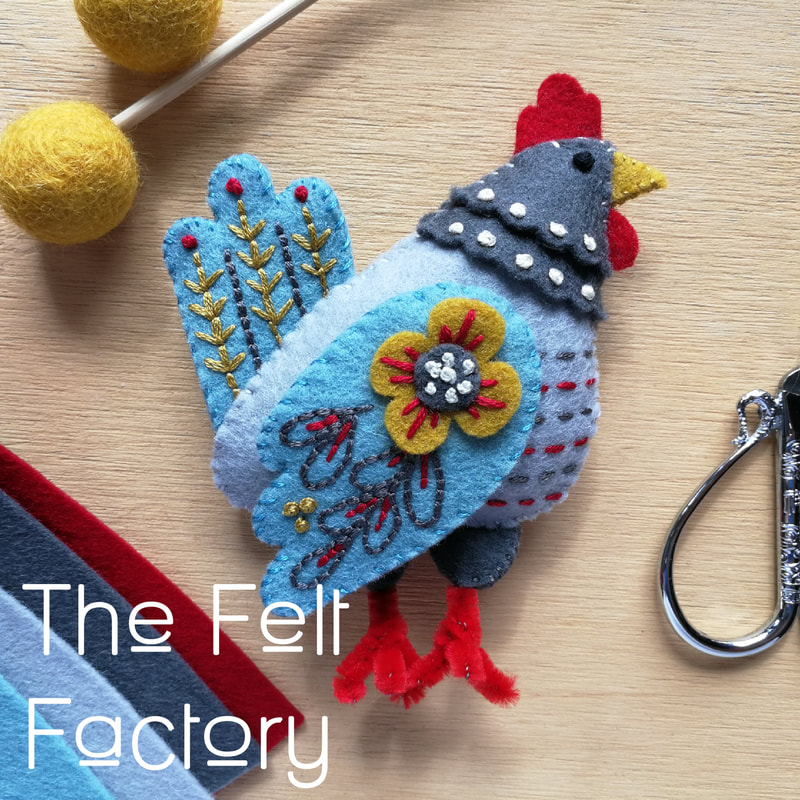
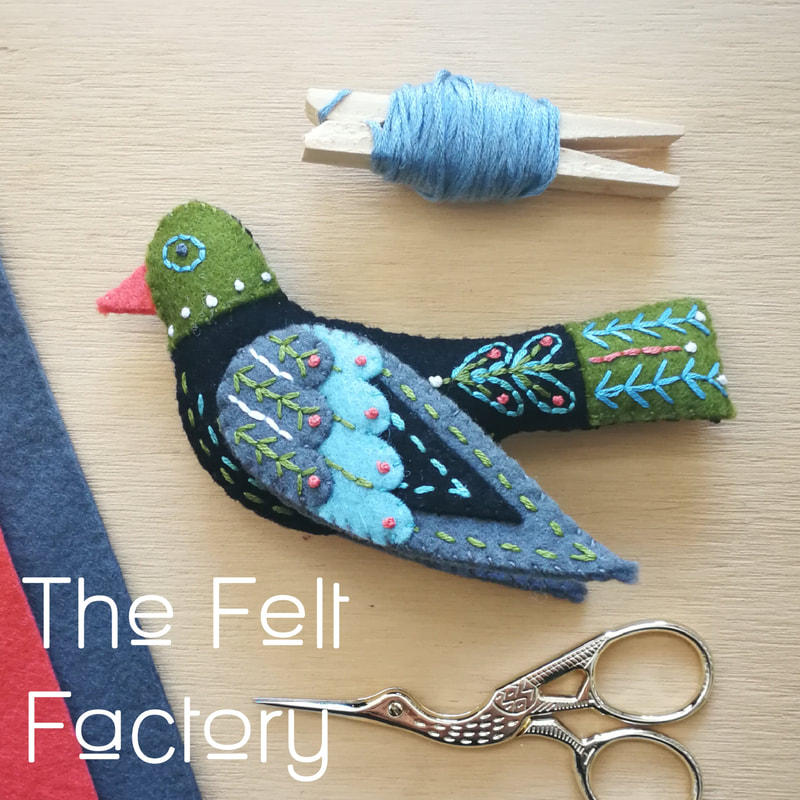
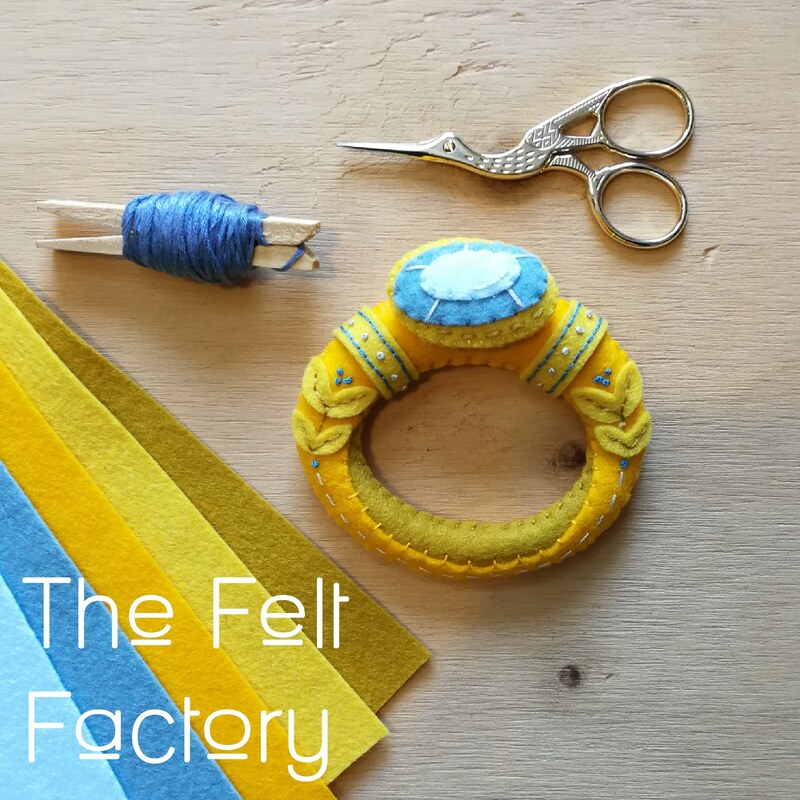
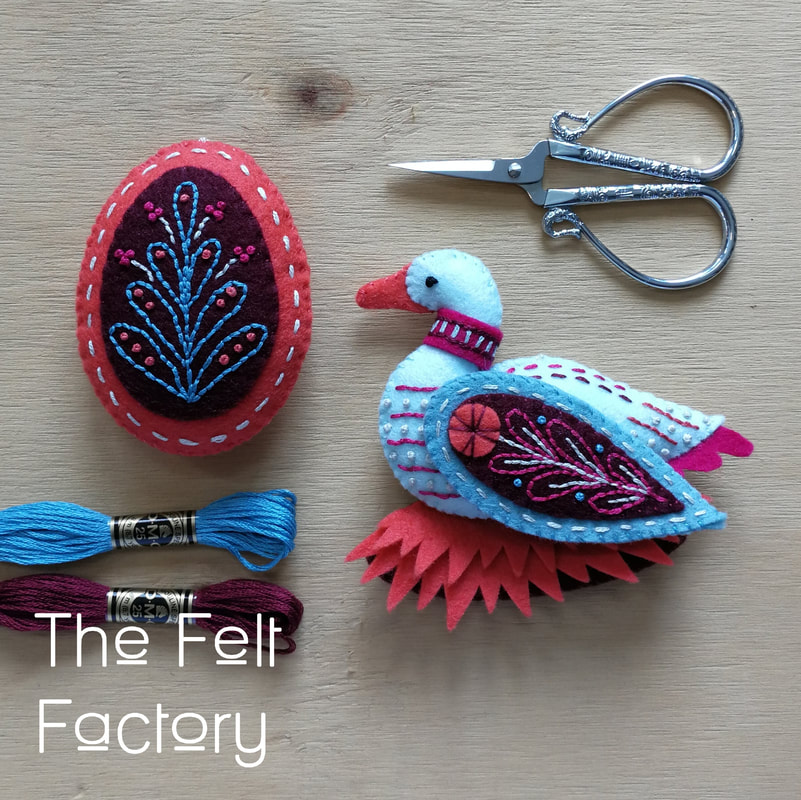
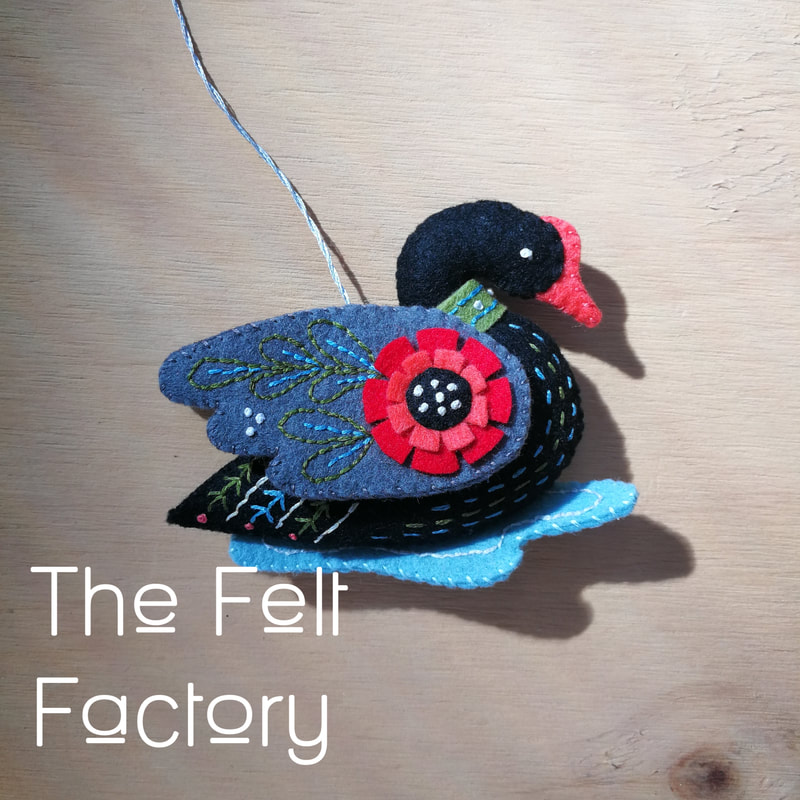
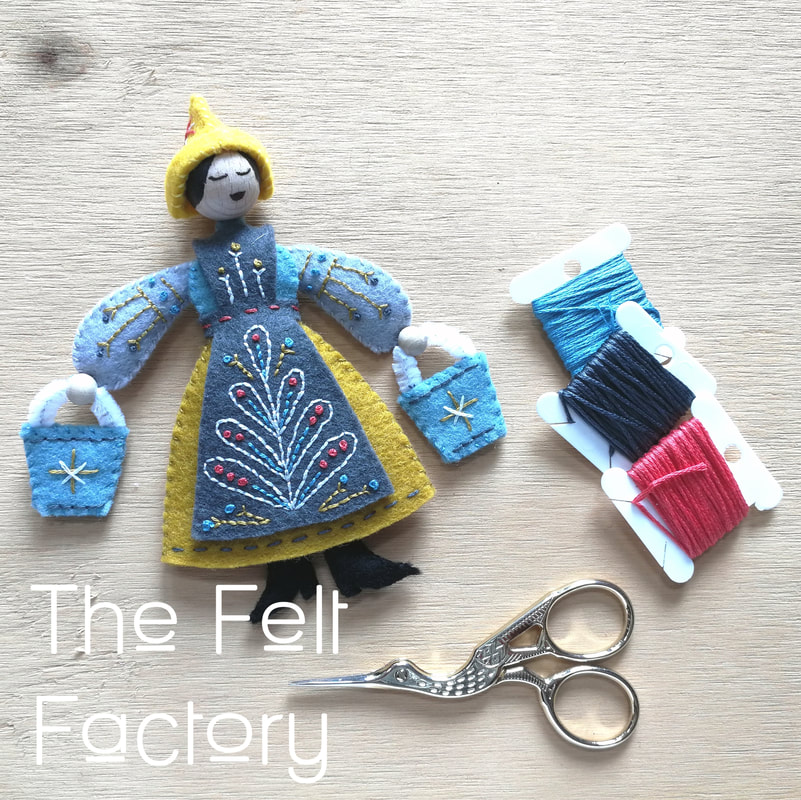
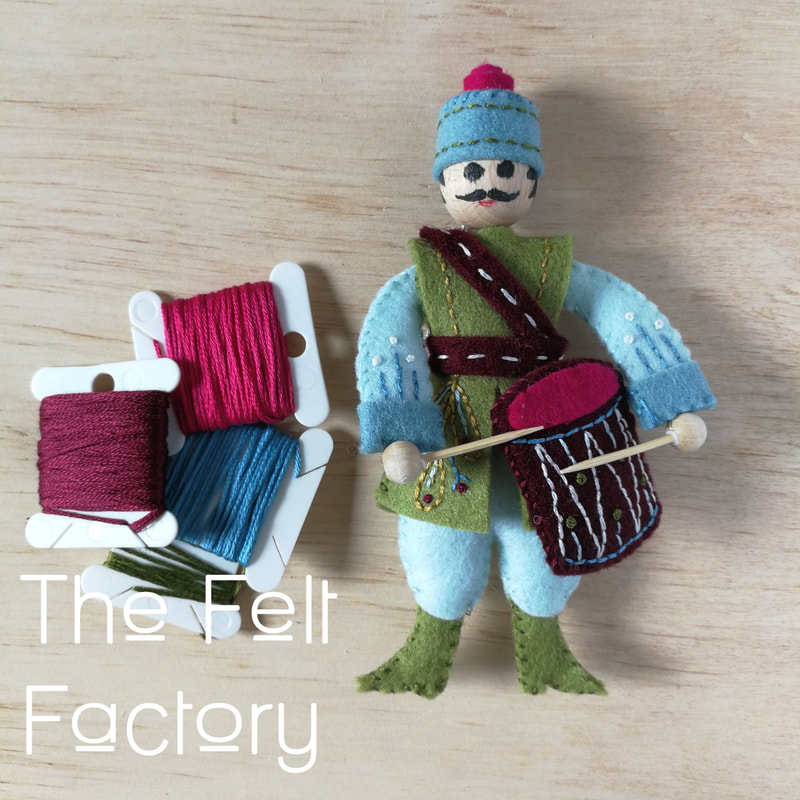
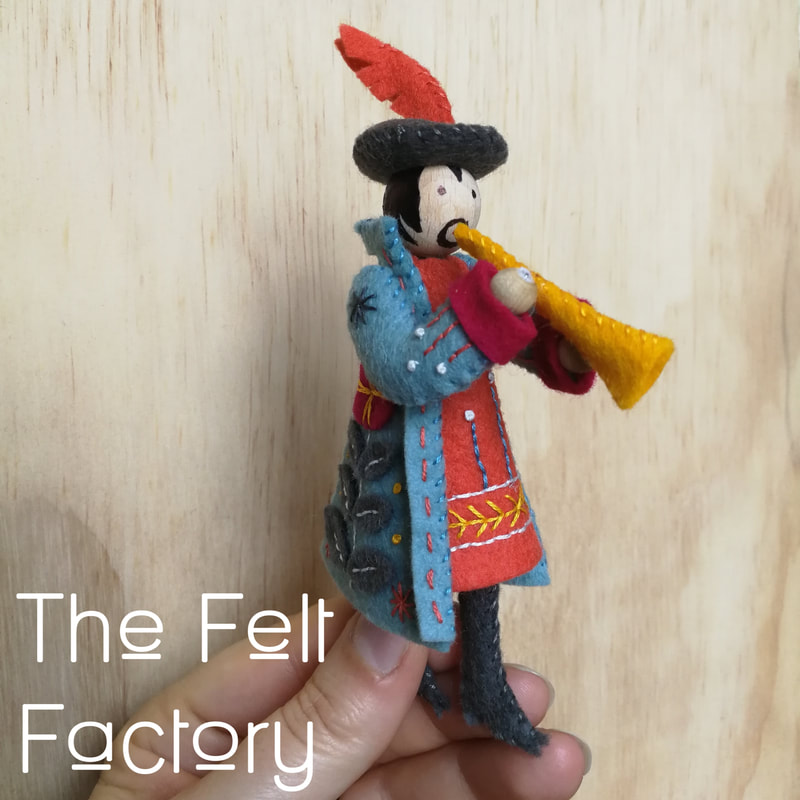
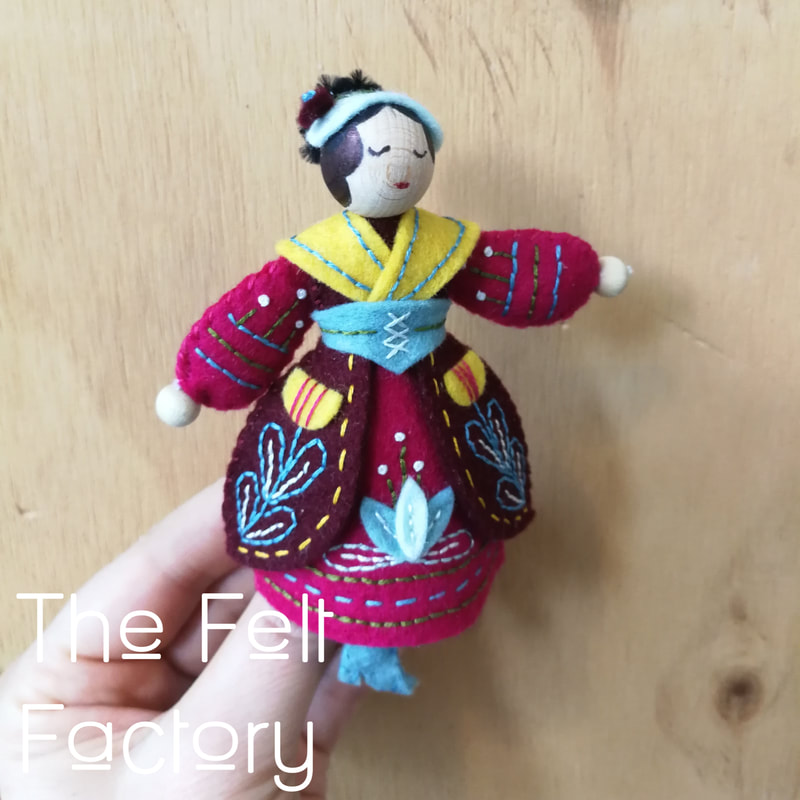
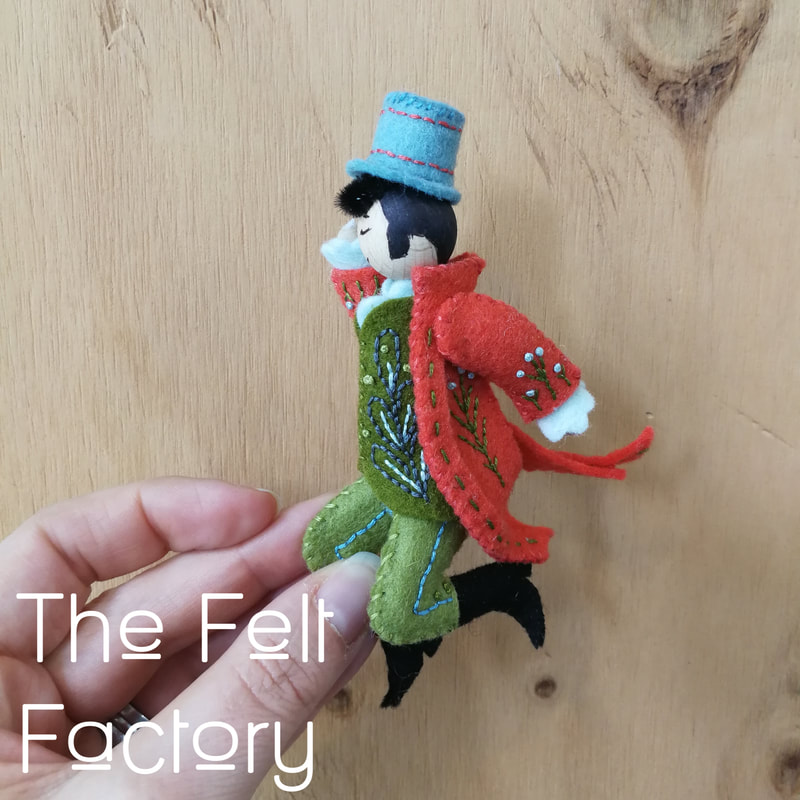
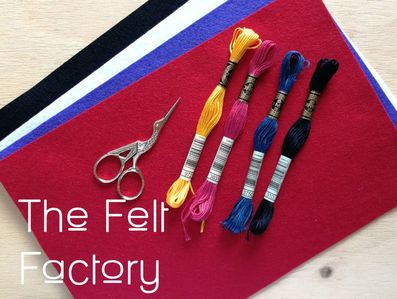
I think its fair to say Larissa Holland's Twelve Days of Christmas ornaments have completely taken the craft world by storm. You can't Google "Christmas" and "felt" without seeing at least one of her beautiful designs. Her patterns are AMAZING, wonderfully detailed with gorgeous photos and diagrams which take you through the patterns step by step. These are perfect for novice and experienced stitcher's alike. These gorgeous projects have been popping up with crafters all over the country and I've had more and more clever people asking for colour advice for making. So, with great joy and anticipation I bought the collection off her Etsy site to make my own set in The Felt Factory colours. I know, it's tough work but someone has to do it! ;) The following blog, I hope, will be a great resource for making this set with our beautiful 100% Merino Wool Felt with suggestions for colours and quantities as well as thread suggestions and links to our fab products. This beautiful set of patterns can be purchased from mmmcraft Etsy store. Available singularly or as a collection. Etsy is brilliant, if you don't already have an account with them, it's super easy to set up, think Trade Me, then purchase and download the pdf patten. NB/ most patterns available from Esty are pdf files, not hard copy patterns. PS. This is the pattern which introduced me to Sticky Fabri-Solvi, THE best craft tool ever!!! Print your pattern straight out onto the sheet then stick it to the felt and stitch over the top. Once you've finished the stabiliser dissolves in water!!!! So handy. This is used throughout and is not mandatory but a fab tool. There are tips for using it and for using alternatives. PPS. Choosing you own colourways are a fun alternative made easier with my colour matched DCM threads on each product page. Wihoo! To complete the set you will need- + 10-14 colours of our 100% Merino Wool Felt Sheets + I used Yellow, Marigold, Gold, Watermelon, Red, Cardinal, Raspberry, Arctic Blue, Mist, Moss, Olive, Dove, Slate and Black. + DMC Thread to match your felt sheets + I used, 726, 972, 832, 351, 321, 902, 600, 3811, 503, 471, 469, 02, 535 and 310 + DMC Metallic Light Effects E415 for hanging + One packet of Sticky Solvy + Beads + Cotton Pipe Cleaners + Chenille Pipe Cleaners + Tacky Glue + A Fabric Pen Partridge & Pear There are so many combinations you can use for these ornaments. I loved all of Larissa's colour ways, this one caught my eye to make for myself. How could you stop at one set though! For the Partridge and Pear I used the following colours in my 100% Merino Wool Felt Sheets: + Yellow + Marigold + Mist Blue + Olive + Moss DMC Embroidery Floss: + 726 - to match Yellow + 972 - to match Marigold + 503 - to match Mist Blue + 469 - to match Olive + 471 - to match Moss + 321 - to match Red + 310 - Black + E415 - for hanging Turtle Dove mmmcrafts Turtle Dove pattern is available by itself here or as part of the whole twelve days ornament set. For my Turtle Dove I used: 100% Merino Wool Felt Sheets + Mist + Watermelon + Cardinal + Raspberry DMC Embroidery Floss + 503 - to match Mist + 351 - to match Watermelon + 902 - to match Cardinal + 600 - to match Raspberry + 310 - Black + E415 - for hanging French Hen mmmcrafts French Hen pattern, number three in the twelve days ornament series, is available by itself here or as part of the whole twelve days ornament set. For my French Hen I used: 100% Merino Wool Felt Sheets + Mist + Dove Grey + Slate Grey + Red + Gold DMC Embroidery Floss + 503 - to match Mist + 02 - to match Dove Grey + 535 - to match Slate Grey + 321 - to match Red + 832 - to match Gold + 310 - Black + E415 - for hanging Colly Bird mmmcrafts Colly Bird pattern, number four in the twelve days ornament series, is available by itself here or as part of the whole twelve days ornament set. For my Colly Bird I used: 100% Merino Wool Felt Sheets + Mist + Slate Grey + Olive + Watermelon + Black DMC Embroidery Floss + 503 - to match Mist + 535 - to match Slate Grey + 469 - to match Olive + 351 - to match Watermelon + 310 - Black + E415 - for hanging Gold RingOn the fifth day of Christmas my true love gave to me! Number five in mmmcrafts twelve days ornament series, is available by itself here or as part of the whole twelve days ornament set. For my Gold Ring I used: 100% Merino Wool Felt Sheets + Yellow + Marigold + Gold + Mist + Arctic Blue DMC Embroidery Floss + 726 - to match Yellow + 972 - to match Marigold + 832 - to match Gold + 503 - to match Mist + 3811 - to match Arctic Blue + E415 - for hanging Goose a-Laying Six Geese a-Laying. Number six in mmmcrafts twelve days ornament series, is available by itself here or as part of the whole twelve days ornament set. For my Goose and bonus Egg I used: 100% Merino Wool Felt Sheets + Cardinal + Watermelon + Raspberry + Mist + Arctic Blue DMC Embroidery Floss + 902 - to match Cardinal + 351 - to match Watermelon + 600 - to match Raspberry + 503 - to match Mist + 3811 - to match Arctic Blue + E415 - for hanging Swans a-swimming Seven Swans a-swimming. Number seven in mmmcrafts twelve days ornament series, is available by itself here or as part of the whole twelve days ornament set. For my Swan I used: 100% Merino Wool Felt Sheets + Black + Watermelon + Red + Mist + Olive + Slate Grey DMC Embroidery Floss + 310 - to match Black + 351 - to match Watermelon + 321 - to match Red + 503 - to match Mist + 469 - to match Olive + 535 - to match Slate Grey + E415 - for hanging Maid a-MilkingEight Maids a-Milking. I had a lot of fun with this one, the first person in the series, she was a lovely fun make with a few extra skills using beads and pipe cleaners. Number eight in mmmcrafts twelve days ornament series, is available by itself here or as part of the whole twelve days ornament set. For my Maid I used: 100% Merino Wool Felt Sheets + Black + Mist + Slate Grey + Gold + Dove Grey DMC Embroidery Floss + 310 - to match Black + 503 - to match Mist + 535 - to match Slate Grey + 832 - to match Gold + 02 - t match Dove Grey + E415 - for hanging Drummer DrummingNine Drummers Drumming. Number nine in mmmcrafts twelve days ornament series, is available by itself here or as part of the whole twelve days ornament set. For my Drummer I used: 100% Merino Wool Felt Sheets + Mist + Moss Green + Arctic Blue + Cardinal + Raspberry DMC Embroidery Floss + 503 - to match Mist + 471 - to match Moss + 3811- to match Arctic Blue + 902 - to match Cardinal + 600 - to match Raspberry + E415 - for hanging Piper PipingTen Pipers Piping. Number ten, and we're nearly there in mmmcrafts twelve days ornament series. This beautiful Piper is available by itself here or as part of the whole twelve days ornament set. For my lovely Piper I used: 100% Merino Wool Felt Sheets + Mist + Slate Grey + Watermelon + Raspberry + Marigold DMC Embroidery Floss + 503 - to match Mist + 535 - to match Slate Grey + 351 - to match Watermelon + 600 - to match Raspberry + 972 - to match Marigold + E415 - for hanging Lady DancingEleven Ladies Dancing. Number eleven in mmmcrafts twelve days ornament series. This lovely Dancing Lady is available by herself here or as part of the whole twelve days ornament set. For my lovely Lady I used: 100% Merino Wool Felt Sheets + Mist + Raspberry + Cardinal + Yellow + Arctic Blue DMC Embroidery Floss + 503 - to match Mist + 600 - to match Raspberry + 902 - to match Cardinal + 726 - to match Yellow + 3811 - to match Arctic Blue + E415 - for hanging Lord a-LeapingTwelve Lords a-Leaping. The final number twelve in mmmcrafts twelve days ornament series. He has so much character, I just love him. His pattern is available by himself here or as part of the whole twelve days ornament set. For my cheeky Lord I used: 100% Merino Wool Felt Sheets + Mist + Watermelon + Olive + Moss + Black + Arctic Blue DMC Embroidery Floss + 503 - to match Mist + 351 - to match Watermelon + 469 - to match Olive + 471 - to match Moss + 310 - to match Black + 3811 - to match Arctic Blue + E415 - for hanging I hope you have enjoyed making these as much as I have.
I'd love to see your completed ornaments, please use #twelvedaysornaments and #thefeltfactorynz to share with myself and Larissa on your social media. Rebecca. xx
2 Comments
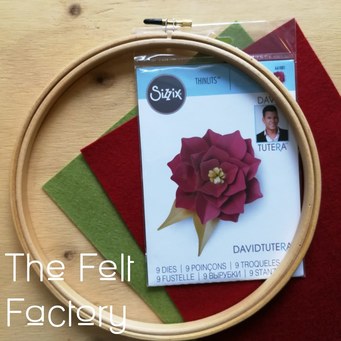
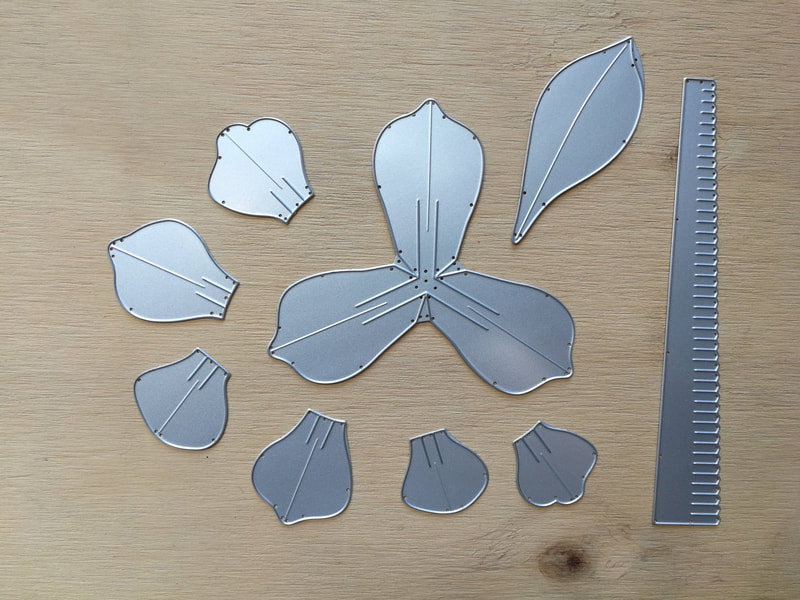
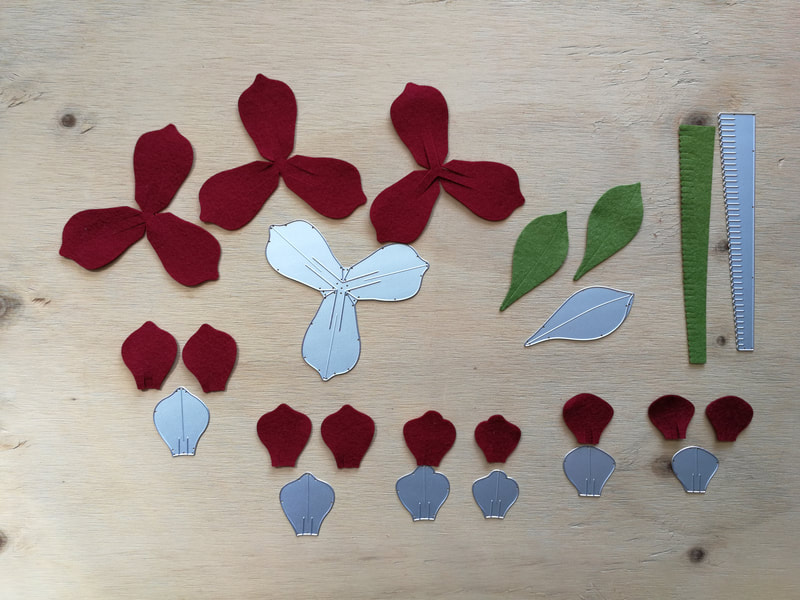
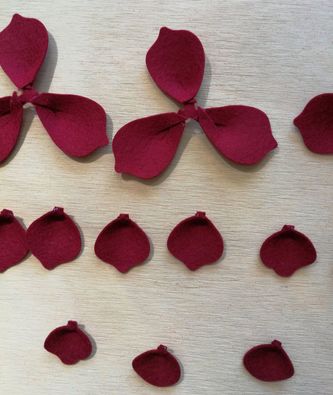
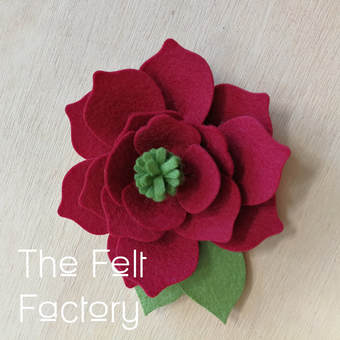
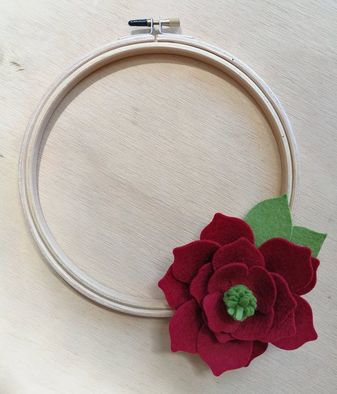
You all know by now how much I love felt flowers. I've had this beautiful Sizzix Thinlits die for a while and have used a few bits of the nine dies included in the set, but not all of them together. Today was just the day to try them out. These dies are super easy to use and will cut felt through most die cut machines using a thin die plate. For this project I have used: 1x 100% Merino Wool Felt Sheet in Merlot 1x 100% Merino Wool Felt Sheet in Olive 1x 7" Embroidery Hoop 1x Sizzix Thinlit Dies by David Tutera And of course my handy hot glue gun! Cut out the felt as pictured above. The die also comes with instructions on how many to cut and how to assemble. Glue the bottom of the petals together and start assembling. Start with the larger and work inwards in threes until finished. Roll stamen up and glue into the centre. Glue leaves to the back and then glue the whole lot onto the hoop. A gorgeous flower for a fun wee project with lots of opportunity for variation.
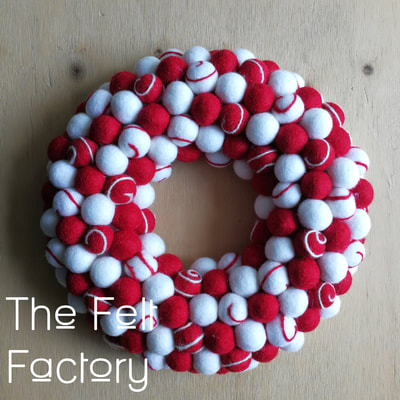
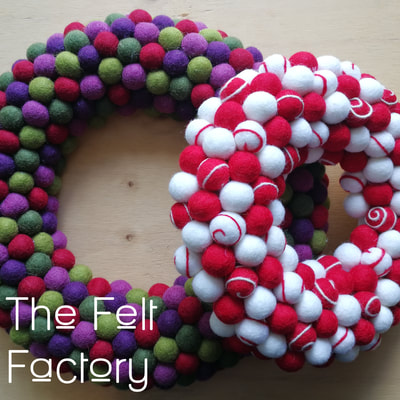
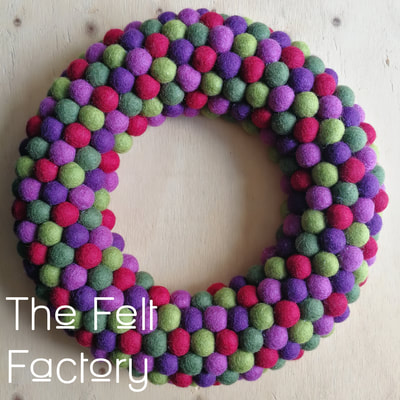
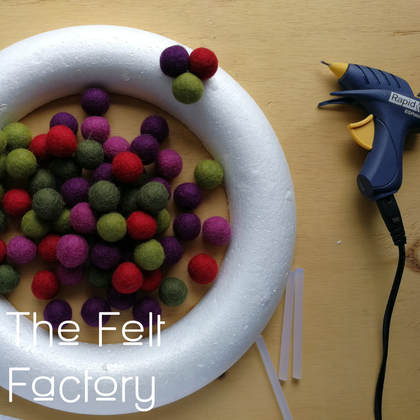
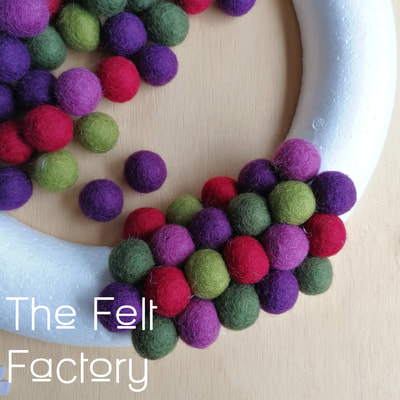
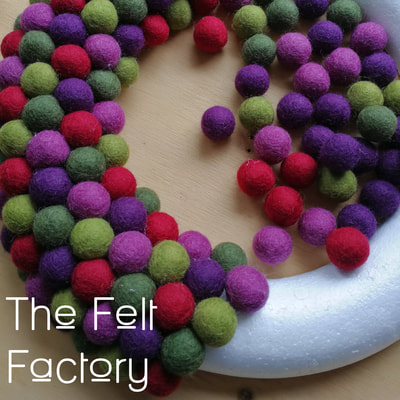
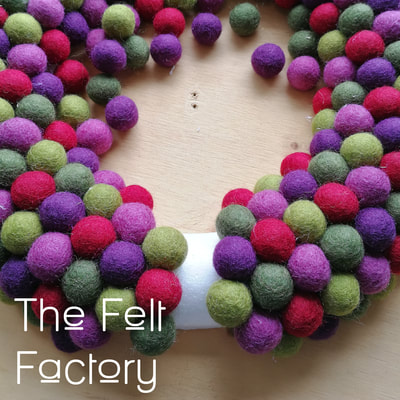
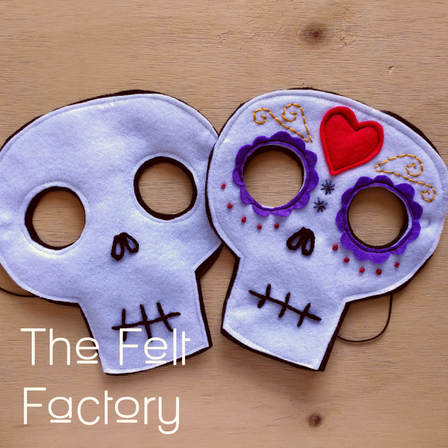
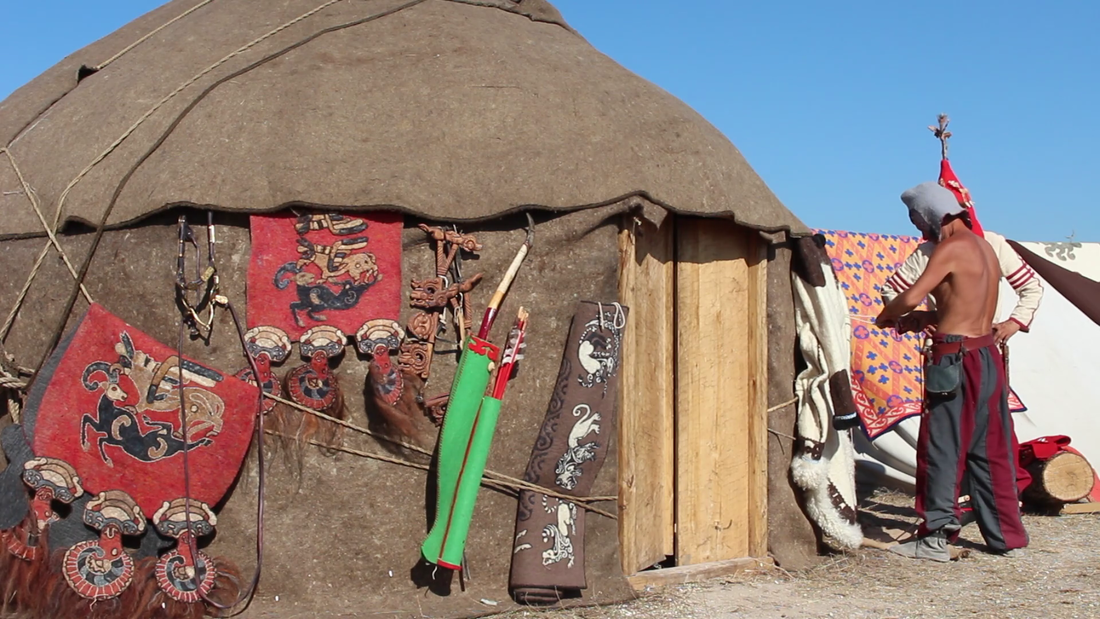
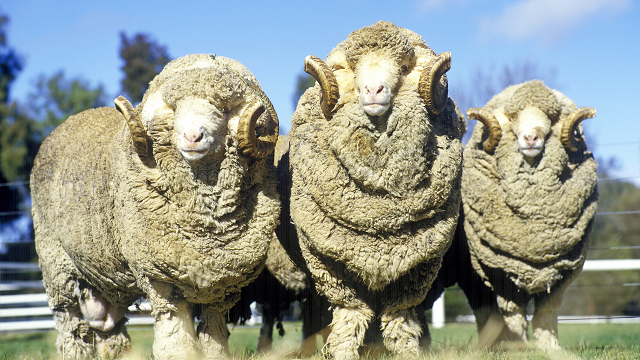
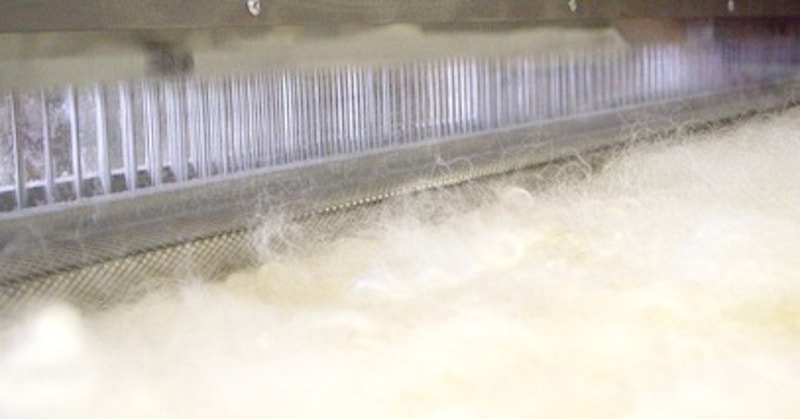
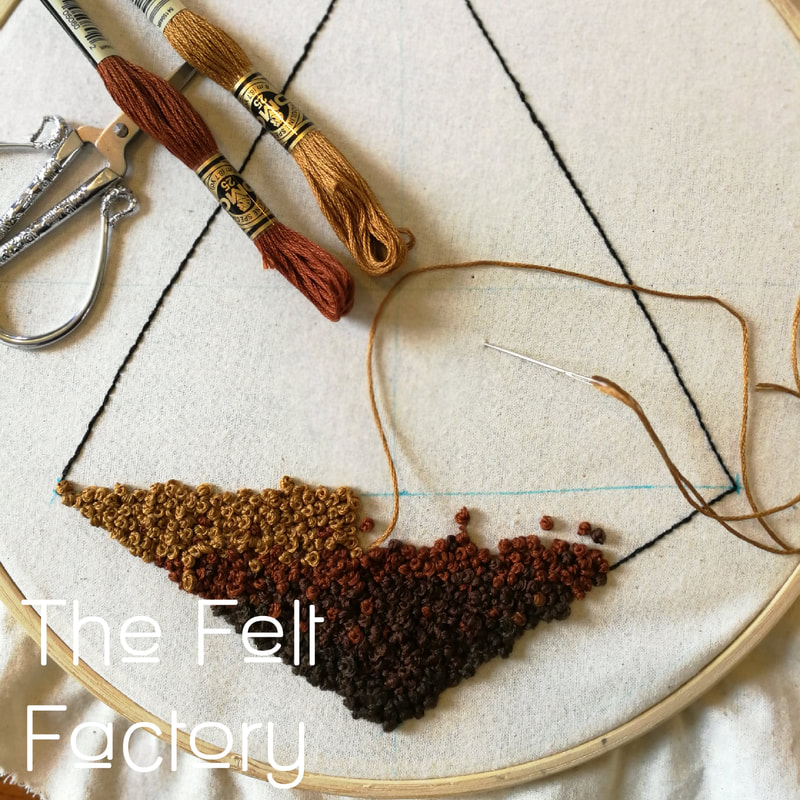
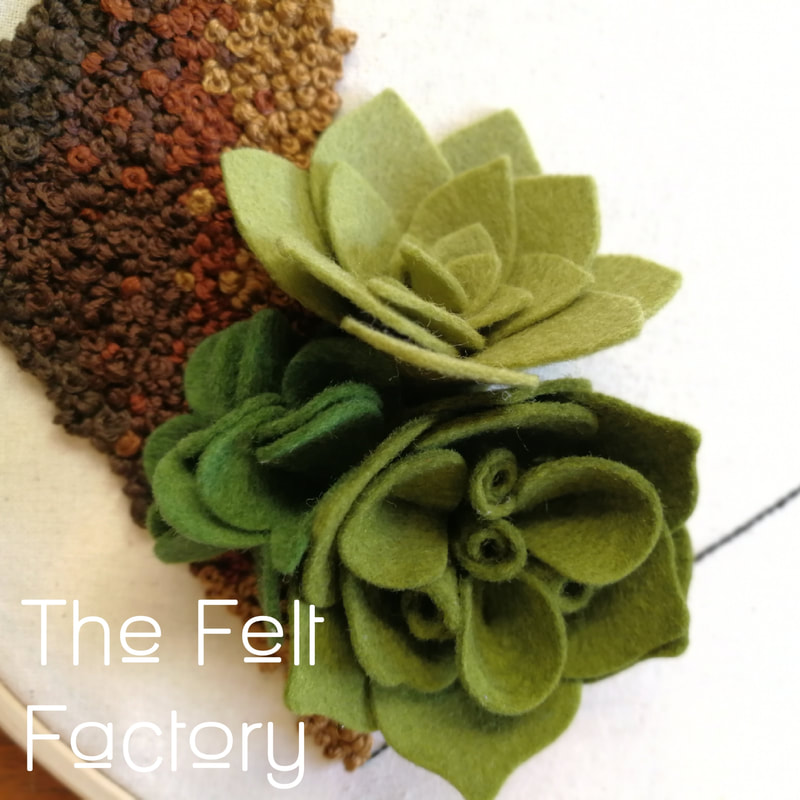
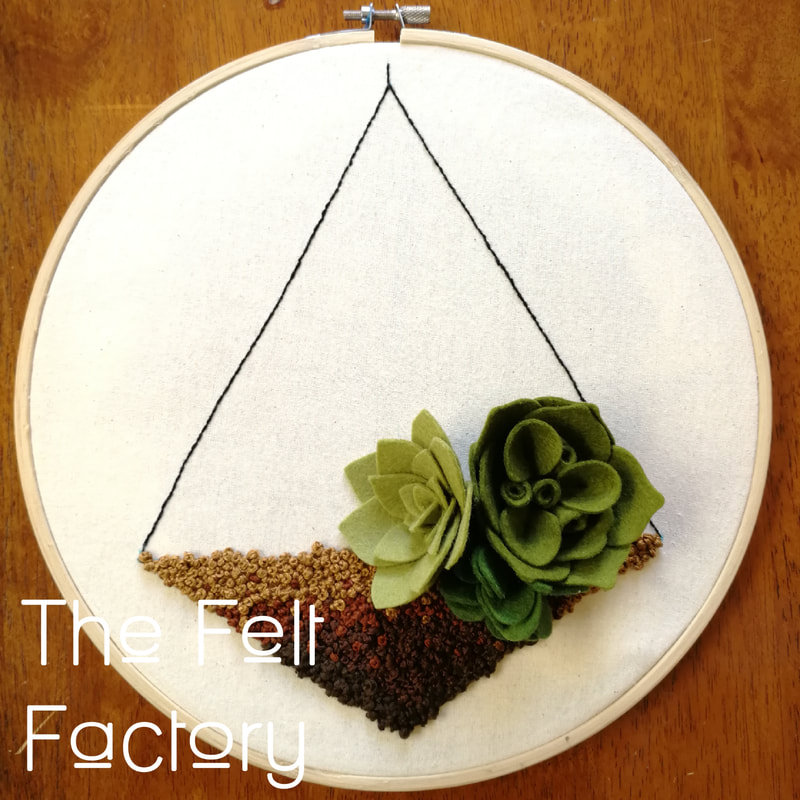
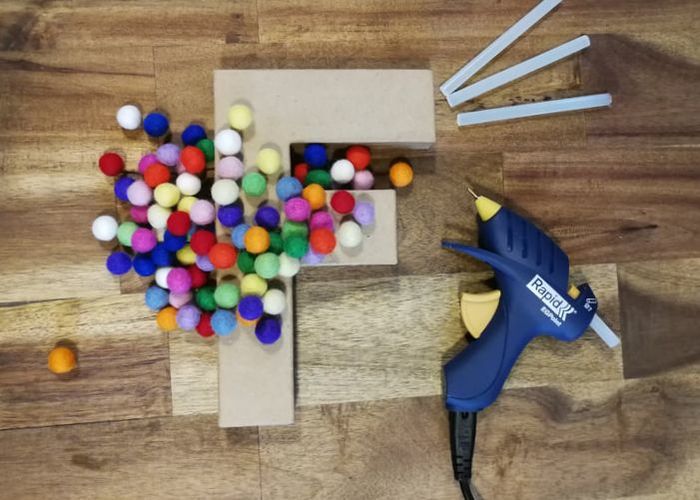
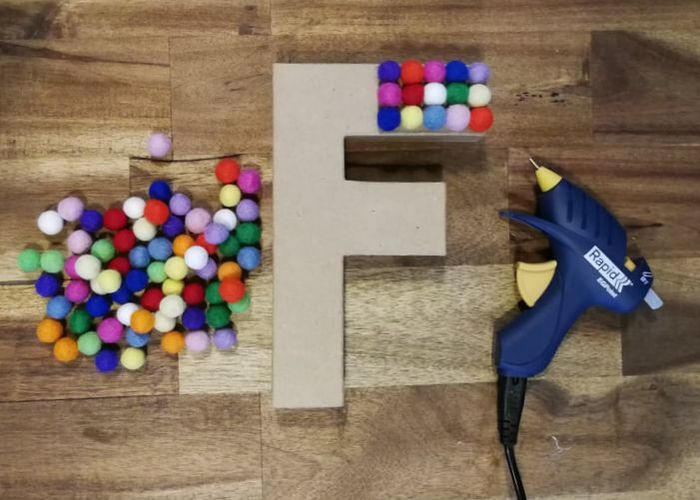
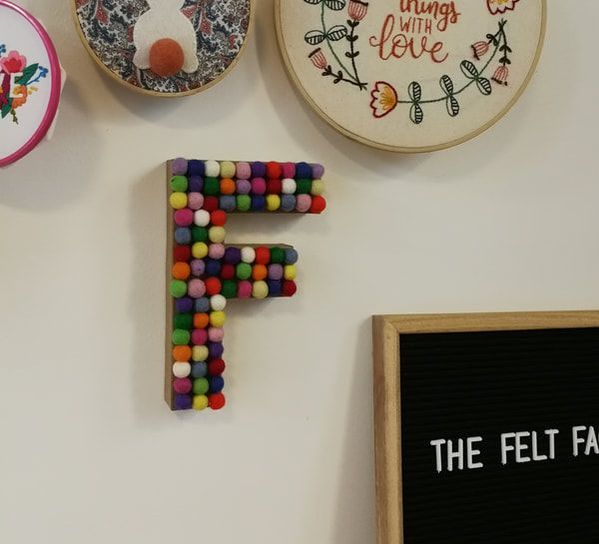
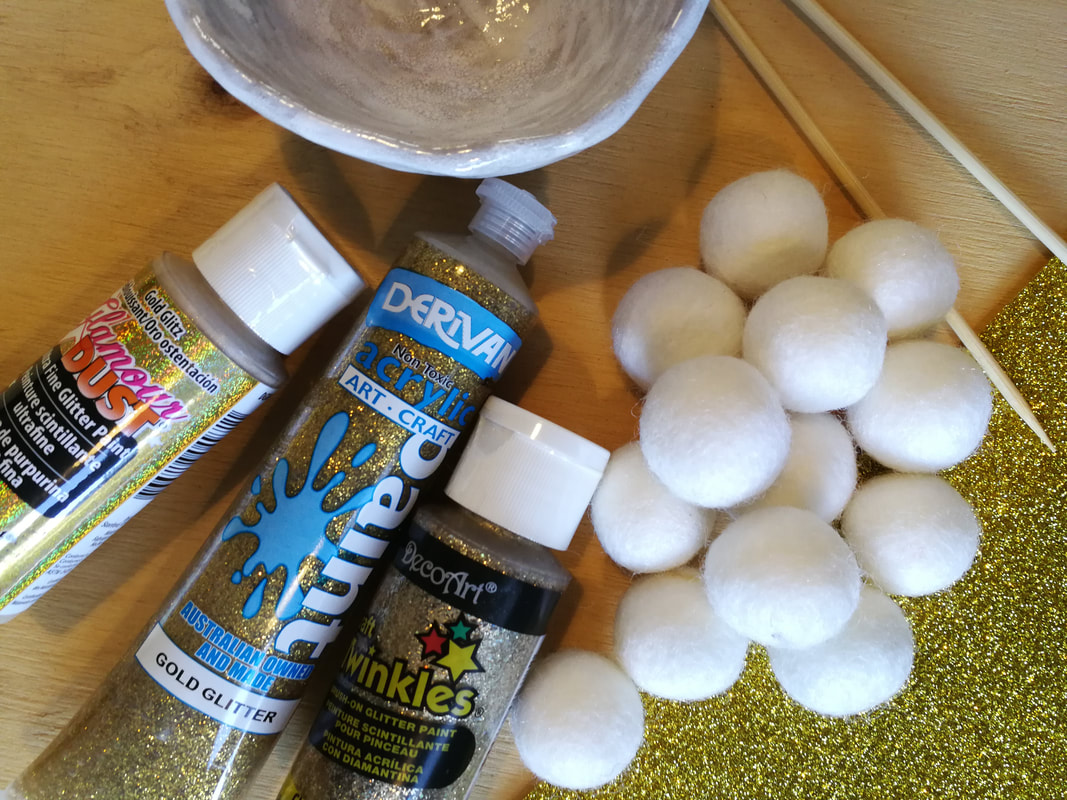
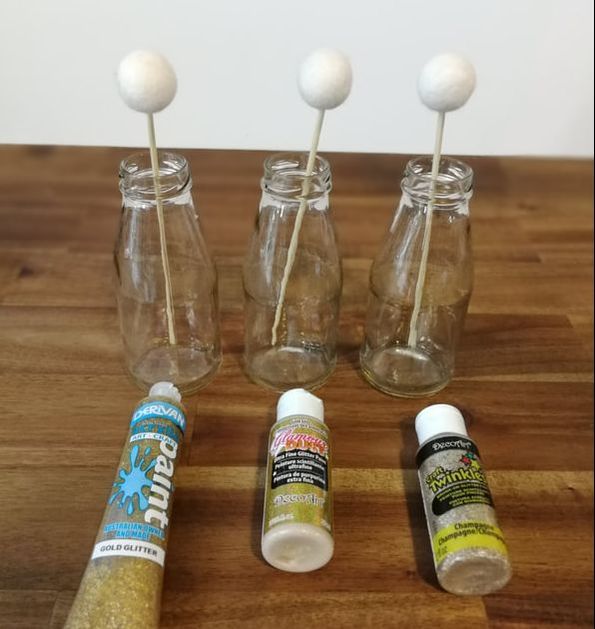
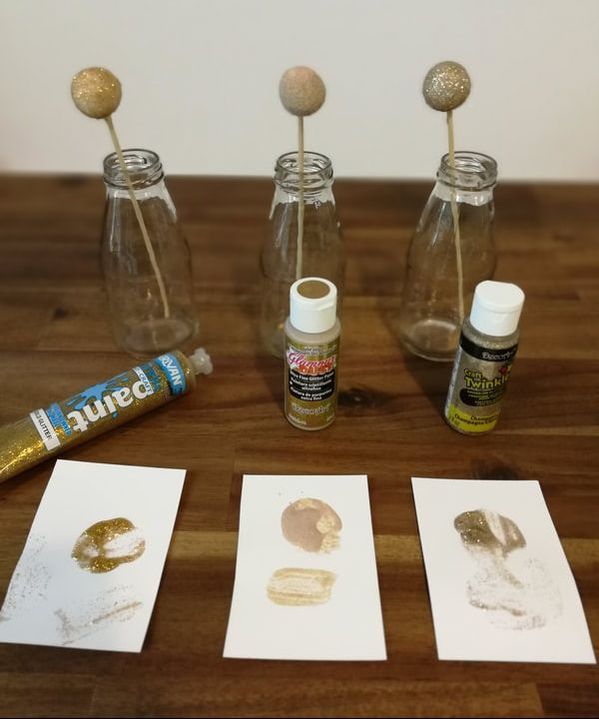
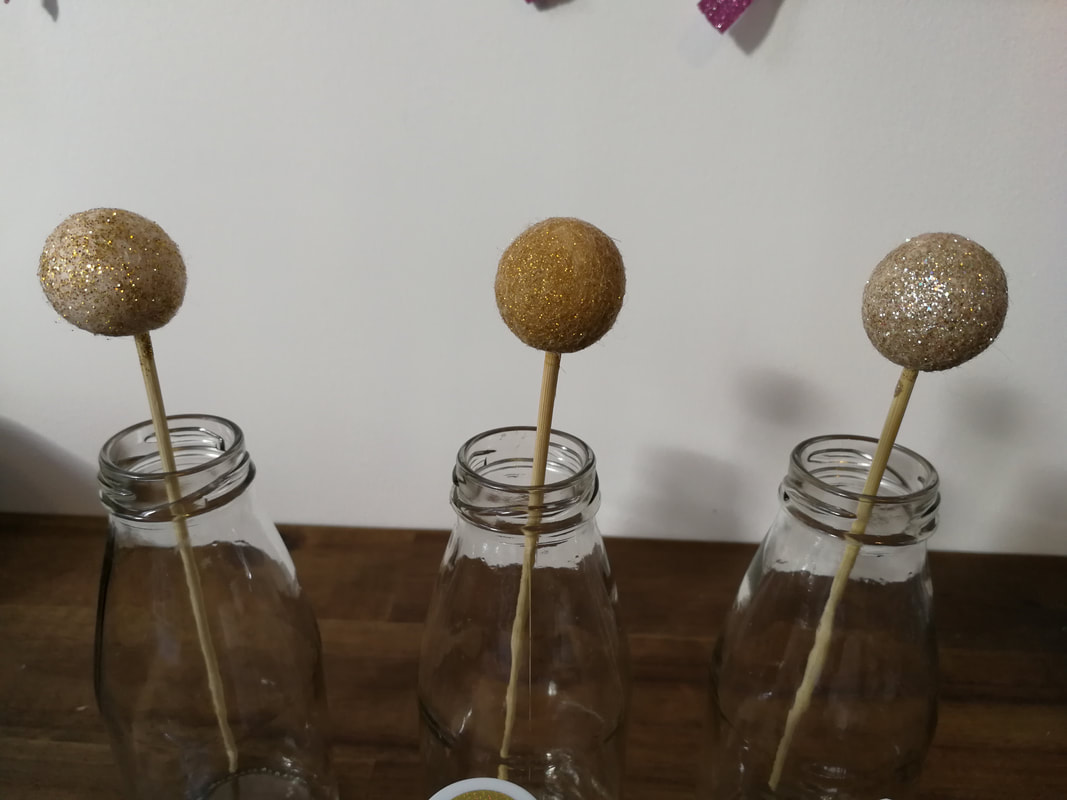
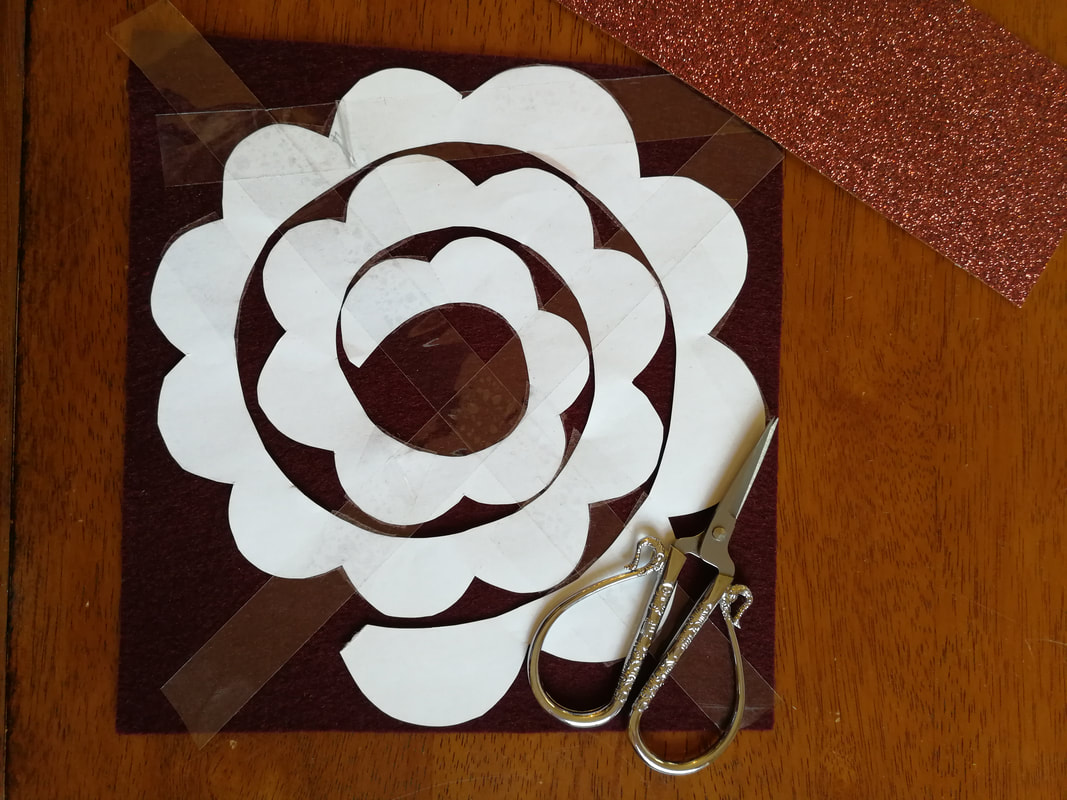
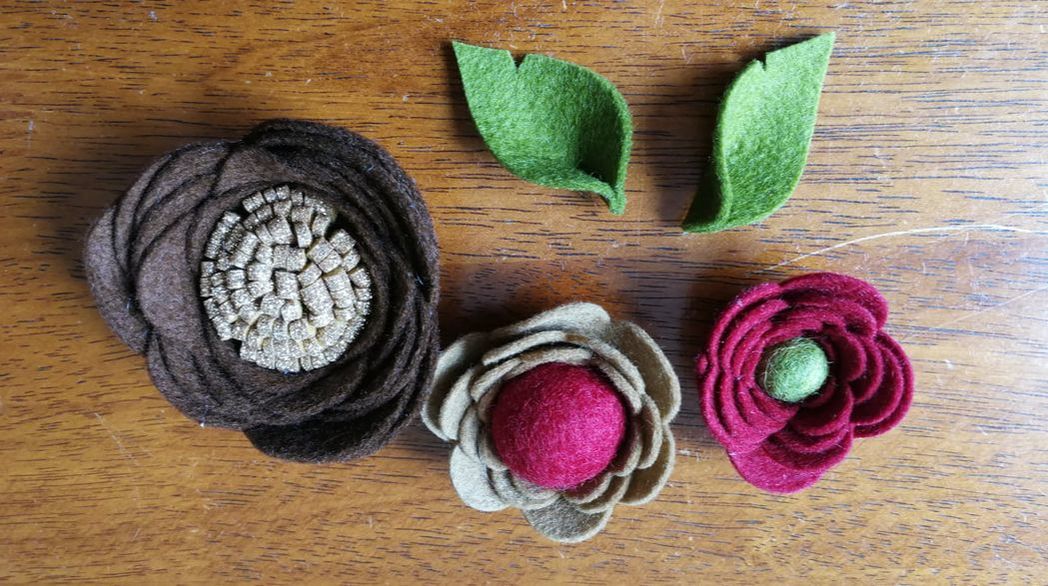
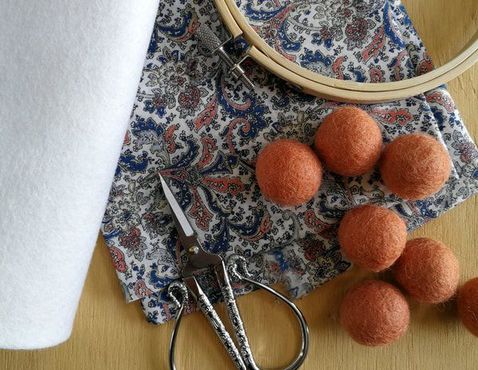
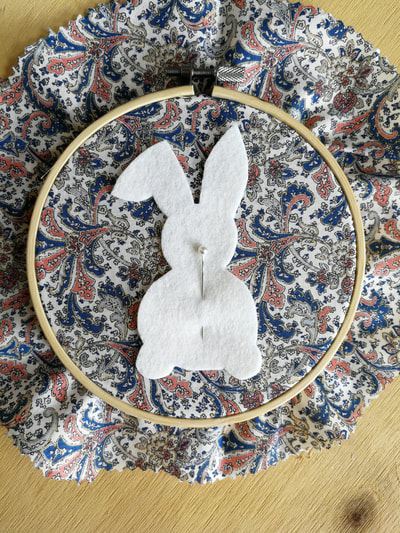
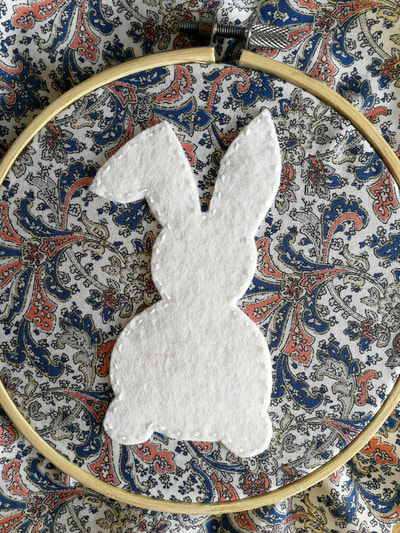
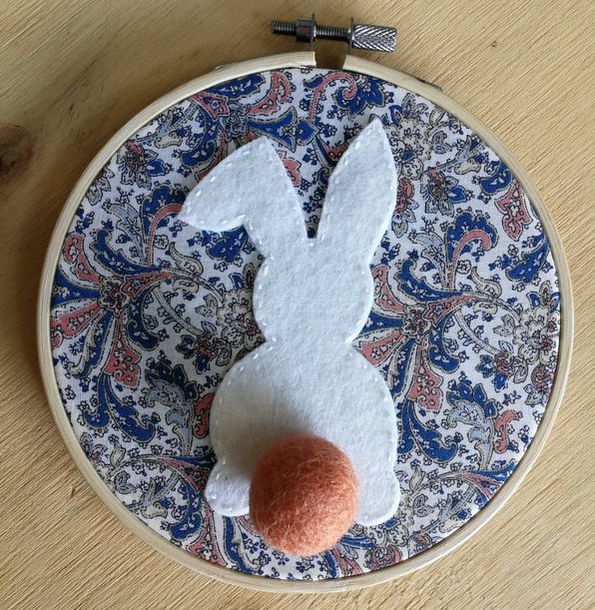
Have fun. Rebecca. xx How cool are these! Such a wonderful, simple project to make for your home for Christmas. We now sell two sizes of polystyrene wreaths especially for felt balls wreaths and with our great tips you can make your own. So to start choose which size wreath you'll need, we have 24cm and 35cm. Choose you felt balls, the very best part!! for the 23cm wreath you'll need 150 2cm balls and the 35cm wreath you'll need 250 2cm balls. I used 5 colours in my large wreath so I had 50 of each colour for my smaller wreath I chose 50 of each red and white and 25 of each stripe. Choose any colours you like to make this totally unique and wonderfully yours. Mix in a few larger sized balls to give a difference again. A glue gun is the very best way to stick your felt balls to your wreath. Make sure you have 8-10 sticks at the ready. Starting at the top of your wreath, applying a dot of glue to each ball to secure. Continue around pushing the balls together to close gaps. Have fun. Rebecca xx We love a good excuse for a dress up and with Halloween right around the corner we thought a couple of cute felt masks were just the thing for a last minute make to scare the neighbours. What you'll need: Our Mask Template 1x sheet 30 x 20cm White Felt 1x sheet 30 x 20cm Black Felt Small scraps of red and purple felt (about 7cm x 7cm) Embroidery thread 28cm length elastic + Print out the pattern and cut out. + Cut one skull in black felt and another slightly smaller in white felt. + Cut embellishments out of chosen colours. + Trim elastic to size. + Pin together Black and white skulls with elastic in between, tie a knot in each end of the elastic to ensure it does not slip out. + Hand or machine stitch around the outside edge of the mask. + Pin and sew embellishments. + Stitch mouth using black thread and a backstitch and the nose with large lazy daisies. Have fun with this pattern and Happy Halloween. Rebecca. xx I always like to know where things come from and how we came to use them on a regular basis. Of course, my felt is the same. Before I started The Felt Factory I did a ton of research about where my felt would come from and its origins. I was thrilled to find suppliers who are very well established manufacturers with businesses that have been kept in the family for years. They sure know their stuff and the quality of their product is a reflection of their longevity in the felt business. Wool Felt making is an ancient tradition and is considered to be the oldest known textile in the world. In Turkey, the remains of felt have been found dating back at least to 6,500 B.C.E. The origins of felt have become entwined with our myth and legend throughout our history. The story of Saint Clement and Saint Christopher tells while fleeing from persecution, the men packed their sandals with wool to prevent blisters. At the end of their journey, the movement and sweat had turned the wool into felt socks. In Noah’s Ark the sheep, goats, camels and other animals that herded together in the Ark shed their fleece and during the voyage trampled it underfoot. After the animals left the Ark, Noah was amazed to find the floor carpeted in felt. Throughout history and still today, Nomadic tribes of Central Asia use felt as a covering for the main wood frame of their Yurts. As a readily available fibre, felt provides warmth and insulation for cold climates. Our gorgeous Merino Wool Felt is made by wet felting. In the wet felting process, hot water is applied to layers of wool, while repeated agitation and compression causes the fibres to hook together or weave together into a single piece of fabric. The fabric is then dyed to the perfect colour and stretched into the correct width and length. Our Wool Blend is made by needle punching. Plant based fibres, like our Rayon fibres, have a smooth structure, needing a different process than traditional felting methods required for pure wool. The wool and rayon fibres are layered into a loose matt, then entangled by needles punching through the matt. The needles are made with barbs that hook or latch onto the fibres interlocking them as the needles move continuously in an up and down. Around the world our manufacturers are using new applications of these old technologies, producing beautiful felt in saturated colours of constantly high quality. We love everything felt and absolutely love bringing these beautiful fabrics to New Zealand. xo, Rebecca. Hoop Art & Felt Flowers! You all know by now, little projects are my absolute favourite. My favourite craft magazine at the moment is the UK based Mollie Makes, a fab source of small projects in all sorts of styles by small business makers and contributors from all over the world. One in particular has been on my work bench since the issue came out. The Embroidered Terrarium pattern is by UK crafter Helen Wilde from Ovo Bloom. So cute, I love a good hoop art project. I did want to change it up a bit, I wanted to incorporate a couple of felt succulents that I've been crushing on by Flohra Design, Deidre is a felt florist from the US, she is so clever and makes the most beautiful felt flowers, she also has great tutorials on making your own. To use my larger felt flowers the hoop needed to be 25cm. I used three shades of brown DMC embroidery thread for the french knots, my 100% Merino Wool Felt Sheets in Fern, Spring and Moss and my brand new Sizzix Dies. Follow the instructions to outline the terrarium and start on the french knots. And the super fun part of making the felt flowers! I used Deidre's gorgeous DIY Felt Succulent with Sizzix Die for the large Fern coloured flower, she has a few other succulent tutorials using dies and hand cut techniques. Check them out and see which ones suit you. She also has a list of the dies and other supplies required to make all her projects. Place your flowers on the hoop, gluing to fix them. Tidy up the back of the hoop and voila! Done and dusted. Have fun with this, I sure did. Happy making, Rebecca. XX DIY Letters with Felt Balls With the school holidays around the corner, we are wishing and hoping for fine weather, however, as usual I have a few activities up my sleeve for a rainy day. These letters are super fun and easy to make in an afternoon. I choose my letter from a great selection in my local craft store. They are available in a few cute fonts and a whole lot of shapes. In papier mache or wood they are around 15cm tall for around $9. Then for the felt balls! I have used 1cm balls for this project in 14 colours with six of each. Starting in one corner, glue the balls on in any order you please. Such a fun little project. Happy Crafting, Bex. PS I absolutely love my new glue gun, its perfect for all my little bity projects. It’s a Rapid precision point with a removable cord, so handy! Who doesn't love glitter. I think there is always an excuse to bling up a project with a bit glitter. I've been stewing over this idea for a while now, and a bit of yuck weather is the perfect opportunity to give it a go. I don't know about you but I need glitter felt balls in my life and wasn't quite sure where to start, so an experiment was in order! I popped down to my local craft shop and bought every glitter fabric or standard glitter paint I could get my hands on. Those turned out to be: Derivan Acrylic Gold Glitter $5.99 DecoArt Glamour Dust- Gold Glitz $7.99 DecoArt Craft Twinkles- Champagne $7.99 Other bits I used were Wooden skewers Paint Brush White Felt Balls With supplies at the ready, off I went. To get started I pushed the felt balls onto the skewers, then with each paint, painted each of my three felt balls. The Derivan had quite chunky glitter and I needed to put quite a lot on for a good coating of glitter. The Glamour Dust has a yellow tint to the paint, I hoped it would dry clear but it didn't. It was quite difficult to see where the glitter was. The Craft Twinkles was very promising, fine glitter with good coverage. Once dry, they all have quite different looks, and I can see more application of paint would change them all again, depending what you want to do with them. I was pleased to find the glitter is firmly fixed to each, with only a slight bit of shedding. As you can see, the Derivan was quite patchy, it the glitter was a great bright gold colour. The Glamour Dust did have a background colour and the glitter was fine and sparkly. The Craft Twinkles was my pick, a great colour and coverage and a plus it comes in a 11 different glitter colours. I hope you have fun with this, I'll really did. Next up, using these for a few cute projects. Happy crafting, Bex. Xx I LOVE felt flowers! Big or small they are so fun are gorgeous for all sorts of projects. I've had a ton of fun trying out a couple of different methods and styles, I tell you, there are so many beautiful projects. Paper templates make beautiful hand cut flowers, there are also some great dies to use with a cutting machine. Of course, in the name of craft I had to try both. Paper Patterns The paper version was super simple, check out my Pintrest board for some great templates. I found the best way to attach the tricky little pattern to my felt was by taping it down, then cutting around the pattern. Start from one end and roll the felt up using a glue gun to secure it all together. Die Cut The die I used was the Spiral Flower from Sizzix, super easy to use. These dies are made for a Big Shot machine but will work through a Cuttlebug too. As with the handcut flower, start rolling and glue as you go. Easy peasy! The great thing about this type of spiral pattern is the versatility of it. I made a couple of variations using contrasting felt balls and a sparkly strip of glitter felt. Gorgeous! So, what to do with your felt flowers? You're only limited by your imagination! Put them on florist wire and in a vase, use them as flourishes on a quilt or wall hanging, hair accessories or something like this >> If you loved this project and want more inspiration, one of my favourite felt florists Flohra Design has a wonderful blog and YouTube channel with heaps of tutorials you'll just love! Happy Making! Bex xx Easter is on it's way! So... it must be time for a cute wee bit of Easter crafting. I love the trend of hoop art at the moment, for those of you unfamiliar, hoop art uses an embroidery hoop, not just to make the piece but to display it also. So many great projects to make and do. So, here we go on my Easter hoop art project! Gather your tools and supplies, you'll need: 1x Embroidery Hoop (I used a 13cm) 1x Square of cotton fabric 1x needle and thread 1x 100% wool felt sheet 1x 2cm wool felt ball Pins and sharp scissors The pattern for the little bunny. + Use the bunny pattern to cut out a shape in the felt. + Pop your fabric into the embroidery hoop and pin on the felt bunny. + Sew the bunny onto the fabric using your preferred stitch. I used a running stitch. + Sew on the felt ball, you may have to loosen the fabric from the hoop to achieve this, + Glue or sew the reverse of the hoop to tidy up the excess fabric. I use a running stitch and pull the fabric together then tie off. You can also glue a circle of felt around the back of the hoop so it looks nice and tidy. +++Hang your gorgeous hoop art+++ Have fun mixing and matching with colours and fabrics. Happy crafting and Happy Easter, Rebecca. xx |
AuthorHi! I'm Rebecca. Archives
March 2023
Categories
All
|


 RSS Feed